Tuesday, November 15, 2011

What Is A Step Motor?


 A step motor (or stepper motor as they are commonly referred) is a digital device, in that digital information is processed to accomplish an end result, in this case, controlled motion. It is reasonable to assume that a step motor will faithfully follow digital instructions just as a computer is expected to. This is the distinguishing feature of a step motor.
Figure 1: One Pulse Equals One Step Figure 2: Pulse Counts Equals Step Counts
In essence, step motors are electrical motors that are driven by digital pulses rather than a continuously applied voltage. Inherent in this concept is open-loop control, wherein a train of pulses translates into so many shaft revolutions, with each revolution requiring a given number of pulses. Each pulse equals one rotary increment, or step (hence, step motors), which is only a portion of one complete rotation.
Therefore, counting pulses can be applied to achieve a desired amount of shaft rotation. The count automatically represents how much movement has been achieved, without the need for feedback information, as would be the case in servo systems.
Figure 3: One Full Step Equals Two Half Steps
Precision of step motor controlled motion is determined primarily by the number of steps per revolution; the more steps, the greater the precision. For even higher precision, some step motor drivers divide normal steps into half-steps or micro-steps. Accuracy of the step motor is a function of the mechanical precision of its parts and assembly. Whatever the error that may be built into a step motor, it is noncumulative. Consequently, it can be negligible.

02K-S523W, Shaft Type 5-Phase Stepping Motor


How Do They Work?
A step motor is an electromagnetic, rotary actuator, that mechanically converts digital pulse inputs to incremental shaft rotation. The rotation not only has a direct relation to the number of input pulses, but its speed is related to the frequency of the pulses.
Figure 4: Motor With Driver
Between steps, the motor holds its' position (and its' load) without the aid of clutches or brakes. Thus a step motor can be precisely controlled so that it rotates a certain number of steps, producing mechanical motion through a specific distance, and then holds its load when it stops. Furthermore, it can repeat the operation any prescribed number of times. Selecting a step motor and using it advantageously depends on three criteria: desired mechanical motion, speed, and the load.

A10K-S545W-G5, Geared Type Stepping Motor

With the appropriate logic, step motors can be bi-directional, synchronous, provide rapid acceleration, stopping, and reversal, and will interface easily with other digital mechanisms. They are further characterized as having low rotor moment of inertia, no drift, and a noncumulative positioning error.
Generally step motors are operated without feedback in an open-loop fashion and sometimes match the performance of more expensive DC Servo Systems. The only inaccuracy associated with a step motor is a noncumulative positioning error measured in % of step angle.

Basic Types: Variable Reluctance, Permanent Magnet, Hybrid
Variable Reluctance (VR) - VR motors are characterized as having a soft iron multiple rotor and a wound stator. They generally operate with step angles from 5 degrees to 15 degrees at relatively high step rates, and have no detent torque (detent torque is the holding torque when no current is flowing in the motor). In Figure 5, when phase A is energized, four rotor teeth line up with the four stator teeth of phase A by magnetic attraction. The next step is taken when A is turned off and phase B is energized, rotating the rotor clockwise 15 degrees; Continuing the sequence, C is turned on next and then A again. Counter clockwise rotation is achieved when the phase order is reversed.

Figure 5: Variable Reluctance Motor
Permanent Magnet (PM) - PM motors differ from VR's by having permanent magnet rotors with no teeth, and are magnetized perpendicular to the axis. In energizing the four phases in sequence, the rotor rotates as it is attracted to the magnetic poles. The motor shown in Figure 6 will take 90 degree steps as the windings are energized in sequence ABCD. PM's generally have step angles of 45 or 90 degrees and step at relatively low rates, but they exhibit high torque and good damping characteristics.

Figure 6: Permanent Magnet Motor
Hybrid - Combining the qualities of the VR and the PM, the hybrid motor has some of the desirable features of each. They have high detent torque and excellent holding and dynamic torque, and they can operate at high stepping speeds. Normally, they exhibit step angles of 0.9 to 5 degrees. Bi-filar windings are generally supplied (as depicted in Figure 7), so that a single-source power supply can be used . If the phases are energized one at a time, in the order indicated, the rotor would rotate in increments of 1.8 degrees. This motor can also be driven two phases at a time to yield more torque, or alternately one then two then one phase, to produce half steps or 0.9 degree increments.

Figure 7: Hybrid Motor 


AH16K-G569W, Hollow Shaft Type Stepping Motor


Where Are They Used?
Although the step motor has been overshadowed in the past by servo systems for motion control, it now is emerging as the preferred technology in more and more areas. The major factor in this trend is the prevalence of digital control, and the emergence of the microprocessor.
Today we have many step motor applications all around us. They are used in printers (paper feed, print wheel), disk drives, photo-typesetting, X-Y plotters, clocks and watches, factory automation, aircraft controls, and many other applications. Ingenuity and further advances in digital technology will continue to extend the list of applications.

A16K-G569-SB, Shaft + Brake Built-in Type Stepping Motor


How Are They Controlled?
Amount, speed, and direction of rotation of a step motor are determined by appropriate configurations of digital control devices. Major types of digital control devices are: Motor Drivers, Control Links, and Controllers. These devices are employed as shown in Figure 8. The Driver accepts clock pulses and direction signals and translates these signals into appropriate phase currents in the motor. The Indexer creates the clock pulses and direction signals. The computer or PLC (programmable logic controller) sends commands to the indexer.
Figure 8: Typical Step Motor System

A140K-M599-GB5, Geared + Brake Built-in Type Stepping Motor


How the Stepper motors are made and how they operate

Part 1

 
Part 2

A50K-M566-RB10, Rotary Actuator + Brake Built-in Type Stepping Motor


Tuesday, November 8, 2011

What Is Photoelectric Sensor ?

What Is Photoelectric Sensor ?
Photoelectric sensors represent perhaps the largest variety of problem solving choices in the industrial sensor market. Today ’s photoelectric technology has advanced to the point where it is common to find a sensor that will detect a target less than 1 mm in diameter while other units have a sensing range up to 60 m. These factors make them extremely adaptable in an endless array of applications. Although many configurations are available including laser-based and fiber optic sensors, all photoelectric sensors consist of a few of basic components. Each contains an emitter, which is a light source such as an LED (light emitting diode) or laser diode, a photodiode or phototransistor receiver to detect the light source, as well as the supporting electronics designed to amplify the signal relayed from the receiver.
Probably the easiest way to describe the photoelectric operating principal is: the emitter, also referred to as the sender, transmits a beam of light either visible or infrared, which in some fashion is directed to and detected by the receiver. Although many housings and designs are available they all seem to default to the basic operating principal.

Just as the basic operating principal is the same for all photoelectric families, so is identifying their output. “Dark-On” and ”“Light-On” refers to output of the sensor in relation to when the light source is hitting the receiver. If an output is present while no light is received, this would be called a “Dark On ” output. In reverse, if the output is ON while the receiver is detecting the light from the emitter, the sensor would have a “Light-On ” output. Either way, a Light On or Dark On output needs to be selected prior to purchasing the sensor unless it is user adjustable. In this case it can be decided upon during installation by either flipping a switch or wiring the sensor accordingly.
The method in which light is emitted and delivered to the receiver is the way to categorize the different photoelectric configurations. The most reliable style of photoelectric sensing is the through beam sensor. This technology separates the emitter and receiver into separate housings. The emitter provides a constant beam of light to the receiver and detection occurs when an object passing between the two breaks the beam. Even though it is usually the most reliable, it often is the least popular due to installation difficulties and cost. This is because two separate pieces (the emitter and receiver) must be purchased, wired and installed. Difficulties often arise in the installation and alignment of two pieces in two opposing locations, which may be quite a distance apart.


Through beam photoelectric sensors typically offer the longest sensing distance of photoelectric sensors. For example, units are available with a 25 m and more sensing range. Long range is especially common on newly developed photoelectric sensors such as models containing a laser diode as the emitter. Laser diodes are used to increase sensing accuracy and detect smaller objects These units are capable of transmitting a well-collimated beam with little diffusion over the sensing ranges as long as 60 m. Even over these long distances, some through beam laser sensors are capable of detecting an object 3 mm in diameter, while objects as small as .01 mm can be sensed at closer ranges. However, while precision increases with laser sensors the speed of response for laser and non-laser through beam sensors typically remain the same, around 500 Hz. An added bonus to through beam photoelectric sensors is their ability to effectively sense an object in the presence of a reasonable amount of airborne contaminants such as dirt. Yet if contaminants start to build up directly on the emitter or receiver, the sensor does exhibit a higher probability of false triggering. To prevent false triggering from build up on the sensor face, some manufacturers incorporate an alarm output into the sensor ’s circuitry. This feature monitors the amount of light arriving on the receiver. If the amount light decreases to a certain level without a target in place, the sensor sends a warning out by means of a built in LED and/or an output wire.
A very familiar application of a through beam photoelectric sensor can be found is right in your home. Quite often, a garage door opener has a through beam photoelectric sensor mounted near the floor, across the width of the door. This sensor is making sure nothing is in the path of the door when it is closing. A more industrial application for a through beam photoelectric is detecting objects on a conveyor. An object will be detected anyplace on a conveyor running between the emitter and receiver as long as there is a gap between the objects and the sensors light does not “burn through ” the object. This is more a figurative term than literal. It refers to an object that is thin or light in color and allows the light emitted from the emitter to penetrate the target so the receiver never detects the object.

 
Diffuse sensors operate under a somewhat different style than retros and through-beams although the operating principle remains the same: diffuse photoelectrics actually use the target as the “reflector”, such that detection occurs upon reflection of the light off the object back onto the receiver as opposed to an interruption of the beam. The emitter sends out a beam of light. Most often it is a pulsed infrared, visible red or laser beam, which is reflected by the target when it enters the detectable area. The beam is diffused off of the target in all directions. Part of the beam will actually return back to the receiver inside of the same housing in which the sensor originally emitted it from. Detection occurs and the output will either turn on or off (depending upon if it is Light On or Dark On) when sufficient light is reflected to the receiver. This can be commonly witnessed in airport washrooms, where a diffuse photo will detect your hands as they are placed under the faucet and the attending output will turn the water on. In this application, your hands act as the reflector.
Due to the operating principle of using the target as the reflector, diffuse photoelectrics are often at the mercy of target material and surface properties; a non-reflective target such as matte-black paper will have a significantly decreased sensing range as compared to a bright white target. But, what seems as a drawback on the surface can actually be a benefit in practice. Because diffuse sensors are somewhat color dependant, certain versions are suitable for distinguishing dark and light targets in applications that require sorting by contrast or quality control. Specialty versions of diffuse sensors are even capable of detecting different colors. Also, with only the sensor itself to mount, installation of diffuse sensors is usually simpler than for through-beams and retros.
Deviations of sensing distances and false triggers when reflective backgrounds are present led to the development of other diffuse sensors. These new developments, allow the diffuse sensor to “see ” an object while simultaneously ignoring any objects behind it.In the simplest of terms, the sensor is looking out at specific point in the foreground and ignoring anything beyond that point. There are two ways in which this function is achieved, the first and most common is using fixed-field technology. In this technology, the emitter sends out a beam of light like a standard diffuse photoelectric sensor. In turn, the light is received by two receivers and a comparator then evaluates how the light is received. One receiver is focused on the “sweet spot ” or desired sensing location and the other on the background or long range. If the comparator finds the long-range receiver is detecting a higher intensity of reflected light, than the amount on the focused receiver, the output will not turn on. Only when the intensity of light on the focused receiver is above the long-range receiver will an output occur.
Adjustable sensing distance versions are also available. The receiver element in an adjustable-field sensor is accomplished by the use of an array of receivers and a potentiometer to electrically adjust the sensing distance.
Fixed-field and adjustable-field photoelectric sensors operate optimally at their preset “sweet spot ”. They allow for the recognition of small parts and a tight drop-off between the sensed target and cutoff point. They also offer an improvement over a standard diffuse sensors ’ difficulty in sensing different color targets. However, target material surface qualities, such a high gloss, can produce various results. In addition, highly reflective objects outside of the sensing area tend to
send enough light intensity back to the receivers for the output to trigger, especially when the receivers are electrically adjusted.
To combat these limitations, a technology known commonly as true background suppression by triangulation was developed. True background suppression sensors emit a beam of light exactly like a standard diffuse, but unlike fixed-field sensors, which rely on light intensity, background suppression units rely completely on the angle at which the beam returns to the sensor.
To accomplish this, background suppression sensors employ two or more receivers accompanied by a
focusing lens. The receivers remain in a fixed position, while the lens is mechanically adjusted to change the angle of received light. .This configuration allows for an extremely steep cutoff between target and background, sometimes as small as .1 mm. Also, this is a more stable method when reflective backgrounds are present, or large target color variations are an issue: reflectivity and color affect the intensity of reflected light, not the angles of refraction used by triangulation-based background suppression photos.
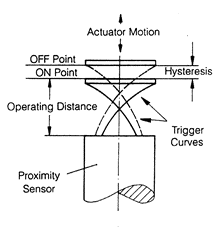
Sunday, October 23, 2011

How Capacitive Proximity Sensor Works?

 Capacitive Proximity Sensor
Control Technology

Capacitive Proximity Sensors detect all materials, including liquids, powders and metallic and non-metallic solids. These sensors are often used to control the levels of pellets, liquids and powders in production control.
Like their inductive counterparts, they are manufactured in shielded and non-shielded configurations and are available in both AC and DC power formats. The shielded models are used to detect solid products such as cartons, stacks of paper, wood or liquids through the wall of a non-metallic container. The non-shielded models are used to detect liquids or powders where the product flows around the sensor. Shielded models have a shorter detection range since part of the field is lost in the shielding process.
All detection ranges given on the following pages are for a steel target which is equal to, or larger than the diameter of the sensor. Non-conductive products, such as wood or plastic, will be detected at a reduced detection range. The range at which a product is detected is directly related to the dielectric constant of the material; the greater the dielectric constant, the greater the detection range
Shielded Configuration: Non-shielded Configuration:
Shielded sensors have a straight-line electrical field. They scan for the presence of solids (e.g. wafers, components, PCB’s, hybrids, cartons, bottles, plastic blocks and stacks of paper) at a distance. Shielded capacitive sensors can also detect liquids through a separating wall (glass or plastic up to a maximum of 4mm thick). Non-shielded sensors have a spherical electrical field. They are designed to touch the product with their active surface. They are used to detect mainly bulk goods or liquids (e.g. granulate, sugar, flour, corn, sand, oil, water or pastes).
Sensitivity Adjustment

All capacitive models have an adjustable sensitivity that allows the calibration to be made in the field. This allows the sensitivity to be set for the target desired; for example, the sensitivity can be reduced to ignore a glass container but still detect the liquid inside the container. Similarly, the sensitivity can be reduced to ignore a build-up of a viscous product such as honey while still detecting the level when a large amount of the product reaches the sensor. To adjust the sensitivity on a Capacitive Proximity Sensor, mount the sensor in the working position. Allow the target material to reach the position where detection should take place. If the material has not been detected, rotate the sensitivity potentiometer clockwise, with the screwdriver provided, until detection first occurs (LED will illuminate). Continue to rotate the potentiometer for another 1/4 turn. Remove the target material and ensure that the sensor turns OFF (LED will turn off). If the sensor turns OFF, leave the sensitivity at that position. If the sensor remains ON, decrease the sensitivity (counterclockwise rotation) until the sensor turns OFF. For best results, position the sensitivity potentiometer half way between these two points.
Capacitive Sensor Oscillator Circuit Capacitive proximity sensors consist of an RC-oscillator with a special multi-part sensing electrode. The electrode and the oscillator circuit have a tube connected with earth potential for lateral shielding. This enables flush mounting of sensor in metal, since the electrical field is only present in front of the sensing electrode. This field is the active zone of the sensor.
When the conductive material is removed from the active zone, the oscillator is undamped and the oscillation amplitude decreases. The amplifier os the oscillator voltage and the sensitivity of the sensor can be altered by the built-in potentiometer.
The middle electrode together with the built-in re-coupling gives very effective compensation under conditions of humidity, dust or icing. Special circuitry automatically compensates for these influences. The preset sensing distance remains nearly constant. The electrode design, along with the compensating circuitry of capacitive sensors, is a unique design, and provides performance advantages far superior to other capacitive sensors.

Capacitive Switch Block Diagram
Applications for Capacitive Proximity Sensors
Liquid Level Control Carton Detection Bin Level Control Resist Liquid Level
Capacitive Proximity Sensors reliably detect liquid levels. The packaging industry relies on Capacitive sensors to detect paper and cardboard cartons. Capacitive Sensors can detect liquids, powders, plastic pellets and pastes for level control. Use Capacitive Sensors to monitor resist liquid levels in pipes.

How Inductive Proximity Sensor Works?

OPERATING PRINCIPLES FOR INDUCTIVE PROXIMITY SENSORS
Inductive proximity sensors are used for non-contact detection of metallic objects. Their operating principle is based on a coil and oscillator that creates an electromagnetic field in the close surroundings of the sensing surface. The presence of a metallic object (actuator) in the operating area causes a dampening of the oscillation amplitude. The rise or fall of such oscillation is identified by a threshold circuit that changes the output of the sensor. The operating distance of the sensor depends on the actuator's shape and size and is strictly linked to the nature of the material (Table 1).


How inductive proximity sensors work

Table 1. Sensitivity when different metals are present. Sn = operating distance.
Fe37 (Iron) 1 x Sn
Stainless steel 0.9 x Sn
Brass - Bronze 0.5 x Sn
Aluminum 0.4 x Sn
Copper 0.4 x Sn
Outputs:
DC Voltage

2 wire DC: These sensors contain an output amplifier with the function N.O. or N.C. that can pilot a load connected in series. In this system a residual current flows through the load even when in the open state and a voltage drop occurs to the sensor when it is in the closed state. Attention must be paid to these restrictions when selecting relays or electronic controls to be used with these sensors. They are compatible with P.L.C. units.
3 & 4 wire DC: These amplified D.C. sensors contain an output amplifier. They are supplied as 3 wire with function N.O. or NC and as 4 wire with complementary outputs (NO + NC) in the types NPN and PNP. Standard version include protected against short circuit, protected against polarity and peaks created by the disconnection of inductive loads. They are compatible with P.L.C. Units

Analog & Linear:
In these 3 wire amplified sensors a current or voltage output varies in proportion to the distance between the sensor and a metallic object.
NAMUR: These are 2 wire non-amplified sensors whose current varies in the presence of a metallic object. The difference between these sensors and traditional sensors is the absence of amplifier trigger stages. Their current and voltage limits allow them to be used in hazardous (explosive) environments when used with approved amplifiers. In standard applications (normal atmospheres) the sensor must be used with amplifier units ALNC, ALN2 or similar.
AC Voltage

2 wire AC: These are two-wire sensors that contain a thyristor output amplifier. In this system a residual current flows through the load even when in the open state and a voltage drop occurs to the sensor when it is in the closed state. Attention must be paid to the minimum switching current, residual current and voltage drop when selecting low consumption relays or high impedance electronic controls to be used with these sensors. They are compatible with P.L.C. Units
Definitions:
NO (normally open): A switch output that is open prohibiting current flow when an actuator is not present and closes allowing current flow when an actuator is present.
NC (normally closed): A switch output that is closed allowing current flow when no actuator is present and opens prohibiting current flow when an actuator is present.
NPN Output: Transistor output that switches the common or negative voltage to the load. The load is connected between the positive supply and the output. Current flows from the load through the output to ground when the switch output is on. Also known as current sinking or negative switching.
PNP Output: Transistor output that switches the positive voltage to the load. The load is connected between output and common. Current flows from the device's output, through the load to ground when the switch output is on. Also known as current sourcing or positive switching.
Operating Distance (Sn): The maximum distance from the sensor to a square piece of Iron (Fe 37), 1mm thick with side's = to the diameter of the sensing face, that will trigger a change in the output of the sensor. Distance will decrease for other materials and shapes. Tests are performed at 20ºC with a constant voltage supply. This distance does include a ± 10% manufacturing tolerance.
Power Supply: The supply voltage range that sensor will operate at.
Max Switching Current: The amount of continuous current allowed to flow through the sensor without causing damage to the sensor. It is given as a maximum value.
Min Switching Current: It is the minimum current value, which should flow through the sensor in order to guarantee operation.
Max Peak Current: The Max peak current indicates the maximum current value that the sensor can bear in a limited period of time.
Residual Current: The current, which flows through the sensor when it is in the open state.
Power Drain: The amount of current required to operate a sensor.
Voltage Drop: The voltage drop across a sensor when driving the maximum load.
Short Circuit Protection: Protection against damage to a sensor if the load becomes shorted.
Operating Frequency: The maximum number of on/off cycles that the device is capable of in one second. According to EN 50010, this parameter is measured by the dynamic method shown in fig. 1 with the sensor in position (a) and (b). S is the operating distance and m is the diameter of the sensor. The frequency is given by the formula in fig. 2.
Repeatability (%Sn): The variation between any values of operating distance measured in an 8 hour period at a temperature between is 15 to 30ºC and a supply voltage with a <= 5% deviation.
Hysteresis (%Sn): The distance between the "switching on" point of the actuator approach and the "switching off" point of the actuator retreat. This distance reduces false triggering. Its value is given as a percent of the operating distance or a distance. See Fig. 3
Flush Mounting: For side by side mounting of flush mount models refer to Fig. 4a. Non-flush mount models can be embedded in metal according to Fig. 4b. for side by side refer to fig. 4c. Sn = operating distance.
Protection Degree: Enclosure degree of protection according to IEC (International Electrotechnical Commission) is as follows:
IP 65: Dust tight. Protection against water jets.
IP 67: Dust tight. Protection against the effects of immersion

Fig. 1

Fig. 2

Fig.3